Over the last week or so I have been diving into the three main public clouds, I covered Microsoft Azure Kubernetes Service, Google Kubernetes Engine and Amazon Elastic Kubernetes Service. We are heading back to Amazon EKS for this post and we are focusing on a lightweight Linux container focused open-source operating system that will be our EKS node operating system in our cluster.
What is Bottlerocket?
“Bottlerocket is a Linux-based open-source operating system that is purpose-built by Amazon Web Services for running containers on virtual machines or bare metal hosts.”

Bottlerocket was released around a year ago in March 2020, an operating system designed for hosting Linux containers, the key areas of focus and improvement for Bottlerocket was around enhancing security, ensuring the instances in the cluster are identical, and having good operational behaviours and tooling. Bottlerocket improves each of these situations. This is why I wanted to look into this a little deeper in my learning curve around Kubernetes and cloud-native workloads.
Security-focused
Key ingredients when focusing on security regardless of running on-premises or in the public cloud is reducing the attack surface, having verified software and images, and enforced permissions. Bottlerocket does not have SSH or many other components that simply reduces a lot of security headaches that we see maybe with traditional VM operating systems. Then I also mentioned reducing the attack surface comes in the way of hardening the operating system with position-independent executables, using relocation read-only linking, and building all first-party software with memory-safe languages like Rust and Go.
Open Source
Bottlerocket is also fully open-sourced, with specific components written in Rust and Go, the Linux Kernel of course and some other open-source components, all under the MIT or Apache 2.0 license.
Another interesting angle I found was that Bottlerocket being open source is one thing but then also the roadmap is also open source. I think this really allows you to not only see what is coming but also enables you to really pin your efforts on a container-based OS that you know is moving in the right direction.
You can find more of a description here as well from the official AWS documentation.
EKS + Bottlerocket
A few posts back we covered EKS and deployment using the AWS CLI, here we are going to walk through creating an EKS cluster using the Bottlerocket OS. With all the benefits listed above about Bottlerocket, I wanted to explore the use case for running the Bottlerocket OS as my nodes in an EKS cluster.
In the next section, we are going to walk through the way in which I did this using the AWS CLI, I was also intrigued that because this is a lightweight open-source operating system it would also mean that I am not having to pay a license fee for the OS and would only have to pay for the EC2 instances and AWS EKS.
Now don’t get me wrong Bottlerocket is not the first and will not be the last container optimised operating system. Neither are AWS the first company to build one on Linux. The first and most notable would be CoreOS, when we think container optimised operating systems, we think small, stripped-down version of Linux.
The final thing I will mention is Bottlerocket is able to perform automated OS updates seamlessly. This is done by having two OS partitions on the OS disk that are identical, when you update only the inactive partition is updated and then once the update is complete without errors the partitions are swapped this also increases the possibilities here when it comes to updates, rollbacks and just keeping the lights on to serve the workloads that we need.
How to create your Kubernetes Cluster
That is enough theory for one day, but hopefully, that gives you a good grasp on some of the benefits and reasons why this little OS is popping up more and more out there in the wild a year after its launch and release.
To begin we are going to create a new key pair using the following command.
#Create a keypair


aws ec2 create-key-pair --key-name bottlerocket --query "bottlerocket" --output text > bottlerocket.pem
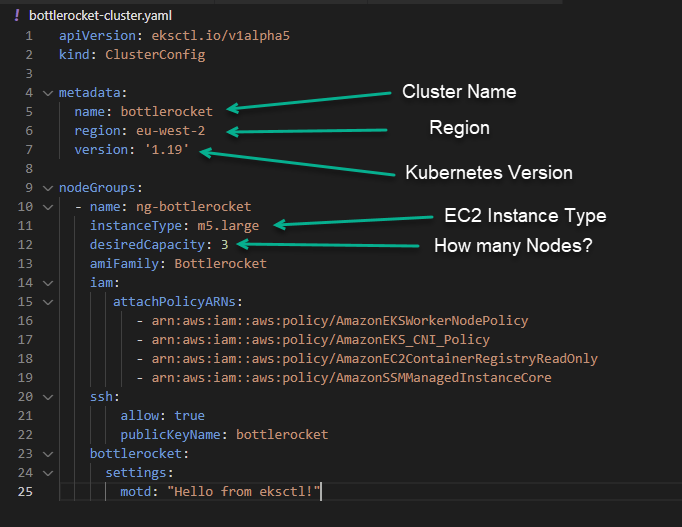
next, we are going to modify this YAML file to suit your requirements. I have labelled some of the key parts to this that you may wish to change to suit your requirements, I will also make sure that this YAML is stored in this repository I have been collecting from these learning posts. I have not highlighted here the AMI Family, this is obviously bottlerocket and if you run through the UI this becomes clear enough on why this is being chosen. You will also notice the publicKeyName that we created in the previous step.

Then we need to create our cluster based on our YAML cluster configuration file above. You can find more information here. You can see I have added how long this took in the comments and this will also be stored in the above repository.
#Create EKS Cluster based on yaml configuration (16 mins)


eksctl create cluster --config-file "D:\Personal OneDrive\OneDrive\Veeam Live Documentation\Blog\AWS EKS Setup\bottlerocket-cluster.yaml"
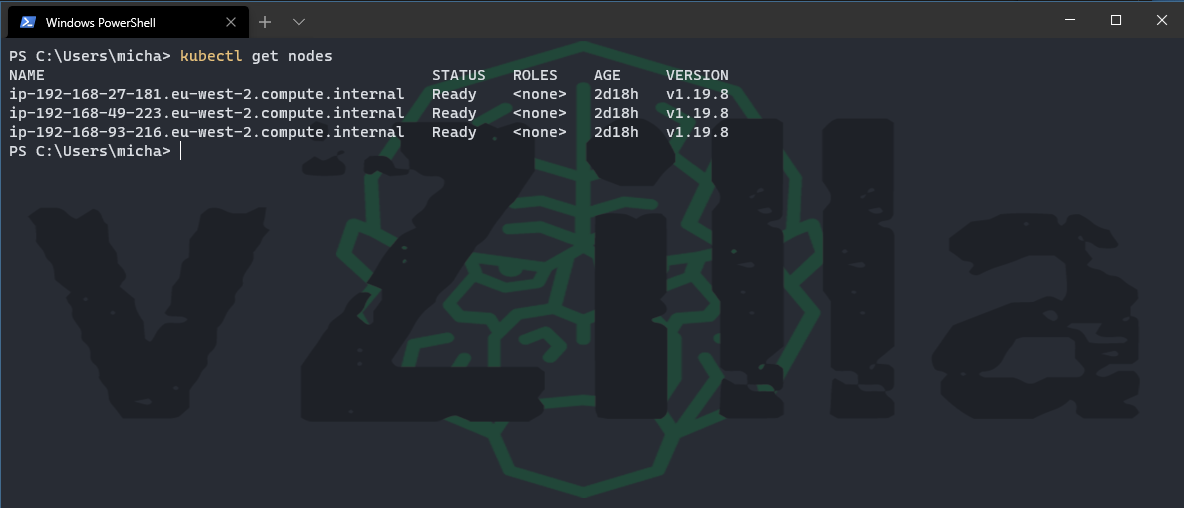
When the above command is completed you will be able to confirm this with the following command.
#Confirm you have access to your new EKS Cluster


kubectl get nodes

But the above command just looks the same as it does for any OS being used as the node operating system.
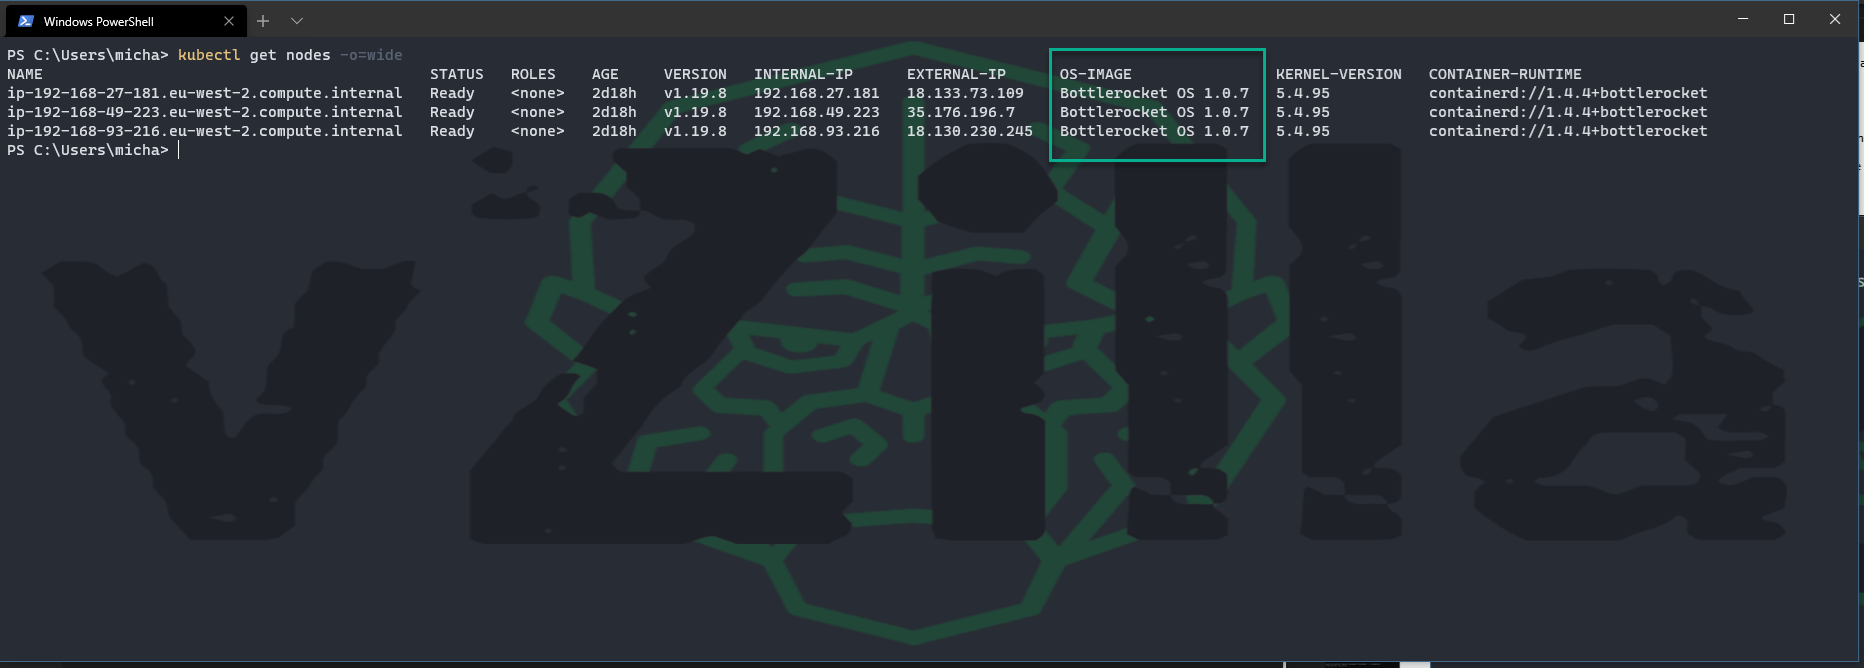
#The above doesn't show your OS image used so run the following to confirm Bottlerocket is being used.


kubectl get nodes -o=wide

Now you can go about deploying your workloads in your new Kubernetes cluster. I have not found any limitations to this but I will cover in a later blog about Installing the CSI Driver and then deploying Kasten K10 into my cluster in EKS to start protecting my stateful workloads.

How did you get the kubeconfig file?