My big project over the last month has not only been getting up to speed around Kubernetes but has had a parallel effort around Kubernetes storage and an open-source project that has been developed and today is released. In this post we are going to touch on how to get going with Kubestr, the first thing to mention is that this is a handy set of tools to help you identify, validate, and evaluate your Kubernetes storage.
The Challenge
The challenge we have with Kubernetes storage is that it’s not all that easy and it’s very manual to achieve some of the tasks that Kubestr helps you with, for example, the adoption of CSI drivers and choice of storage available to us within our Kubernetes clusters is growing so fast. This tool is going to assist in validating that the CSI driver is configured correctly for snapshots for example this, in turn, means we can use data protection methods within our cluster. Another hard task is benchmarking storage, it can be done today or prior to Kubestr but it’s a potential pain to make this happen and it takes time. Kubestr allows us to hit the easy button to evaluate.
All of this whilst there are so many options out there for storage, we want to make sure we are using the right storage for the right task, at the end of the day you can go and pay for the most expensive disk especially in the public cloud but let’s make sure you need it and you don’t overspend and also instead of spending your time building benchmarking tools manually this will save you time to giving you a better understanding and visibility into your storage options.
You can find out more here on the Kasten by Veeam blog explaining in more detail the challenges and the reasons Kubestr was born.
Getting Started with Kubestr
We all use different operating systems to manage our Kubernetes clusters, first and foremost Kubestr is available across Windows, macOS and Linux you can find links to these releases as well as source code here.
Once you have this installed on your OS the first command, I suggest is (I am running windows) We can see then the simplicity of what can be used from a command point of view as well as additional available commands.
.\kubestr.exe --help
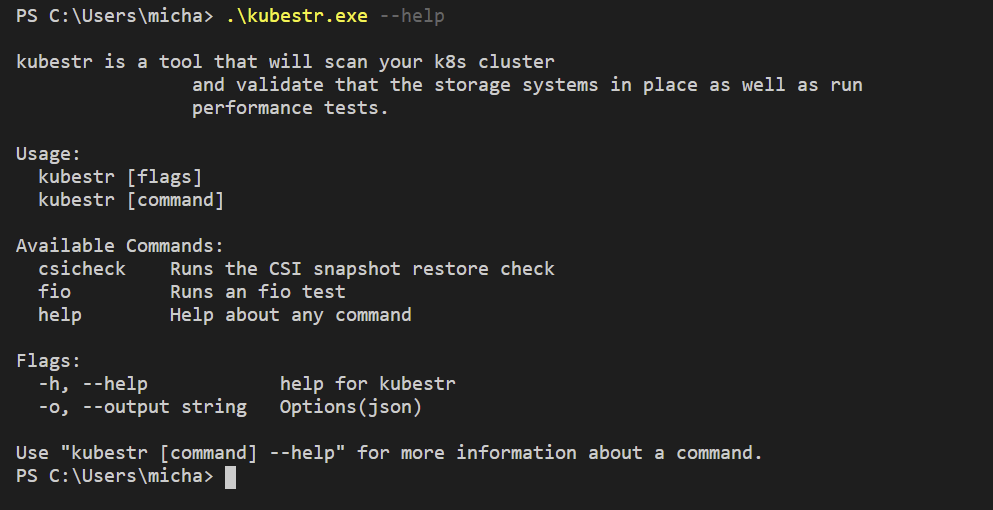
Identify your Kubernetes Storage options
The first step that this handy little tool can help you with is just giving you visibility into your Kubernetes storage options available to you. I am running this below against an Amazon EKS cluster using the Bottlerocket OS on the nodes. I have also installed the AWS EBS CSI drivers and snapshot capabilities that now is not deployed by default. Now my cluster is new and has been configured correctly but this tool is going to highlight when things are not configured maybe you have the storage class available but you do not have the Volume Snapshot class or maybe you have multiple storages available and some of that is not being used and this highlights that you have this storage attached and could highlight that you could save by removing it.
.\kubestr.exe
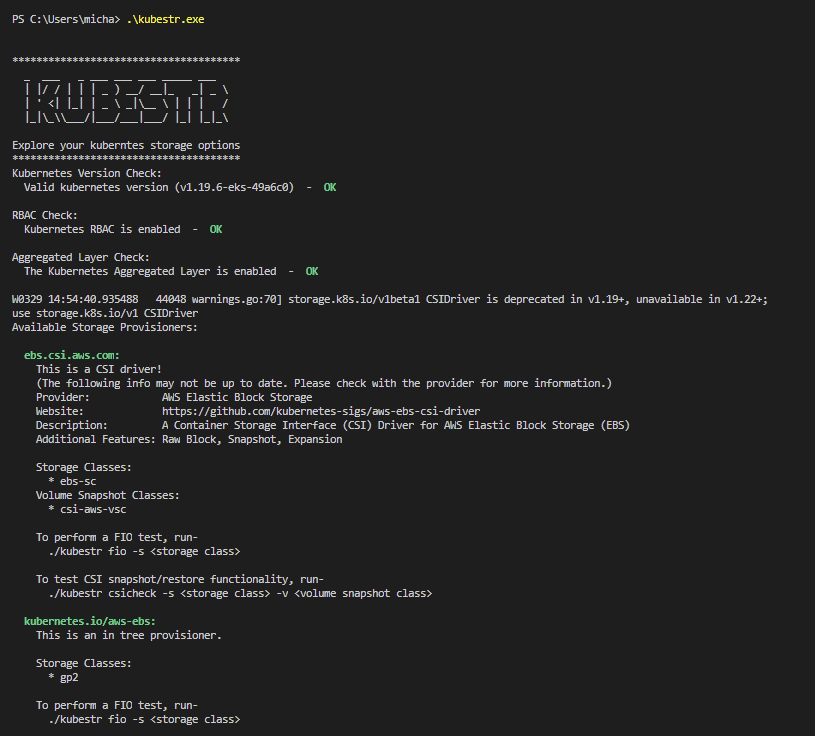
Validate your Storage
Now that we have our Storage classes and our volume snapshot class, we can now run a check against the CSI driver to confirm if this was configured correctly. If we run the same help command with the csicheck command, you get the following options.
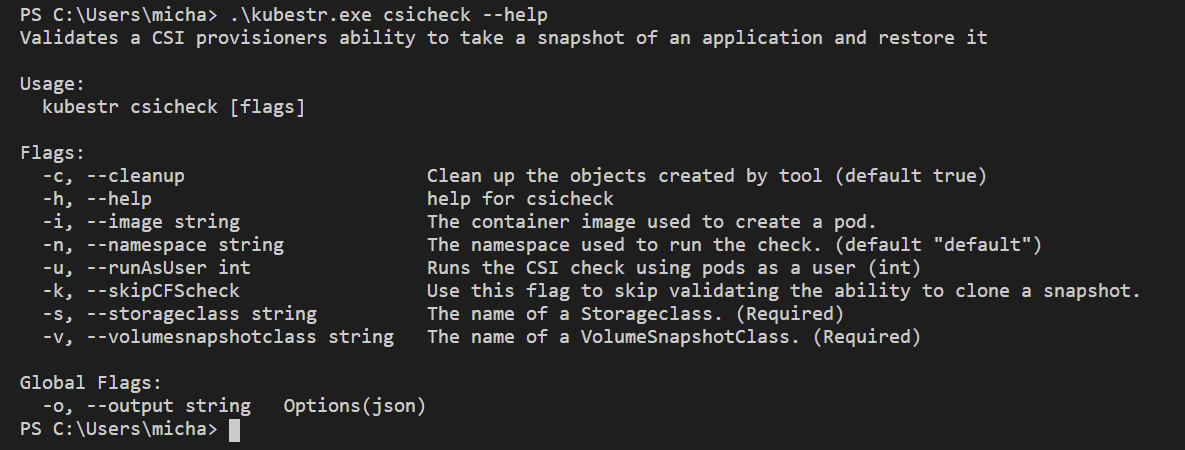
If we run against our Kubernetes cluster, storage class and volume snapshot class we will see the process on the below image that runs through creating the application, taking a snapshot, restoring the snapshot and confirming that the configuration is complete.

.\kubestr.exe csicheck -s ebs-sc -v csi-aws-vsc

Evaluate your Storage
Obviously, most people will not just have access to one Kubernetes cluster, for us to run against additional clusters you simply change the kubectl config context to the cluster you would like to perform the tests against. In this section, we want to look into the options around evaluating your Kubernetes storage. This has a very similar walkthrough to the CSIcheck we mentioned and covered above apart from there is no restore but we are going to get the performance results from Flexible IO.

Let’s start with the help command to see our options.
.\kubestr.exe fio –help
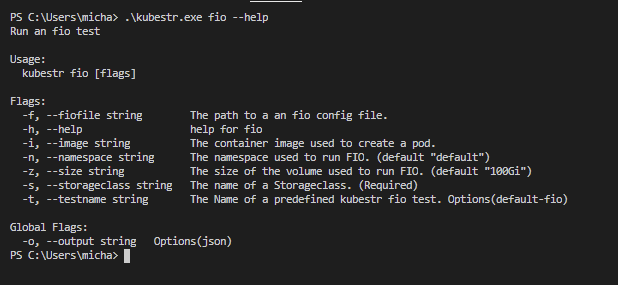
Now we can run a test against our storage class with the following and default configurations as listed above.
.\kubestr.exe fio -s ebs-sc
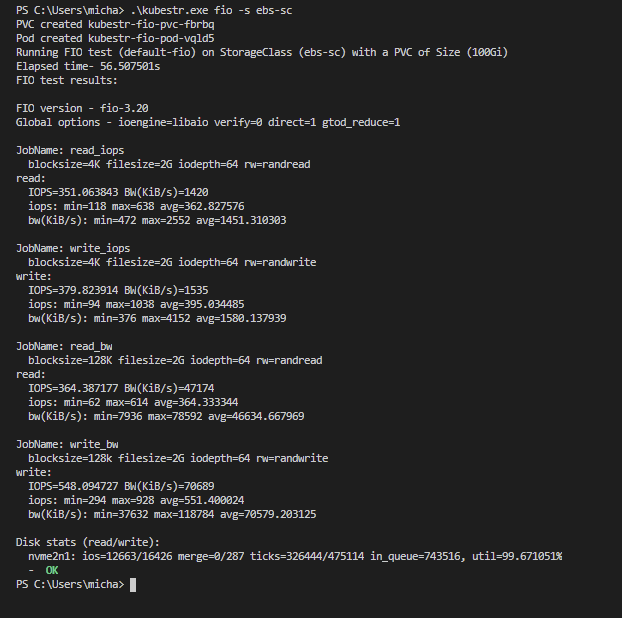
Now we can get more catered to specific workloads with different file sizes for the tests.
.\kubestr.exe fio -s ebs-sc -z 400Gi
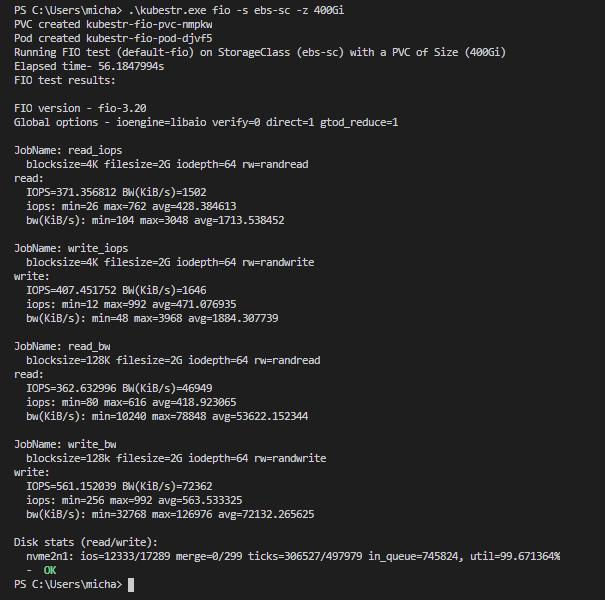
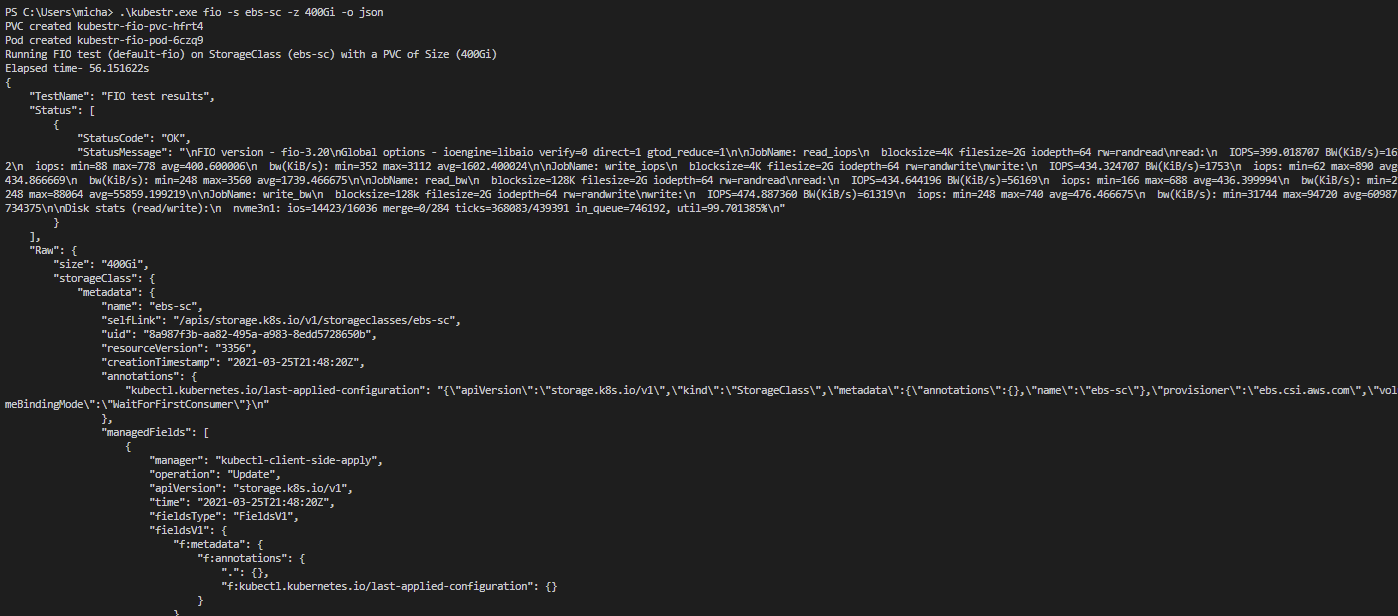
Then we can output this to JSON and this is where we see the community helping here to be able to extract that JSON and allow for a better reporting method on all of the results so that the community can understand storage options without having to run these tests manually on their own clusters.
.\kubestr.exe fio -s ebs-sc -z 400Gi -o json


.\kubestr.exe fio -s ebs-sc -z 400Gi -o json > results.json
I won’t post the whole JSON but you get the idea.
Finally, we also can bring your own FIO configurations, you can find these open source files here
#BYOFIO - # Demonstrates how to read backwards in a file.

.\kubestr.exe fio -s ebs-sc -f "D:\Personal OneDrive\OneDrive\Veeam Live Documentation\Blog\Kubestr\fio\examples\backwards-read.fio"


#BYOFIO - fio-seq-RW job - takes a long time!


.\kubestr.exe fio -s ebs-sc -f "D:\Personal OneDrive\OneDrive\Veeam Live Documentation\Blog\Kubestr\fio\examples\fio-seq-RW.fio"
I have just uploaded a quick lightning talk I gave at KubeCon 2021 EU on this handy little tool
My next ask is simple, please go and give it a go and then give us some feedback,

1 Comment