In a previous post, we hopefully covered the why and where the CSI has come from and where it is going and the benefits that come with having an industry-standard interface by enabling storage vendors to develop a plugin once and have it work across a number of container orchestration systems.
The reason for this post is to highlight how to install the driver and enable volume snapshots, the driver itself is still in the beta phase, and the volume snapshot is in the alpha phase, alpha phase software is not supported within Amazon EKS clusters. The driver is well tested and supported in Amazon EKS for production use. The fact that we must deploy it in our new Amazon EKS clusters means that the CSI for Amazon EBS volumes is not the default option today. But this will become the standard or default in the future.
Implements CSI interface for consuming Amazon EBS volume
Before we start the first thing we need is an EKS cluster, to achieve this you can follow either this post that walks through creating an EKS cluster or this which will walk through creating an AWS Bottlerocket EKS cluster. If you want the official documentation from Amazon then you can also find that here.
OIDC Provider for your cluster
For the use case or at least my use case here with the CSI driver I needed to use IAM roles for services accounts to do this you need an IAM OIDC provider to exist in your cluster. First up on your EKS cluster run the following command to understand if you have an existing IAM OIDC provider for your cluster.
#Determine if you have an existing IAM OIDC provider for your cluster


aws eks describe-cluster --name bottlerocket --query "cluster.identity.oidc.issuer" --output text

Now we can run the following command to understand if we have any OIDC providers, you can take that id number shown above and pipe that with a grep search into the below command.
#List the IAM OIDC Providers if nothing is here then you need to move on and create


aws iam list-open-id-connect-providers

If the above command did not create anything then we need to create an IAM OIDC provider. We can do this with the following command.
#Create an IAM OIDC identity provider for your cluster


eksctl utils associate-iam-oidc-provider --cluster bottlerocket –-approve
Repeat the AWS IAM command that will now or should return something as per the above screenshot.
IAM Policy Creation
The IAM policy that we now need to create is what will be used for the CSI drivers service account. This service account will be used to speak to AWS APIs
Download the IAM Policy example if this is a test cluster you can use this, you can see the actions allowed for this IAM account in the JSON screenshot below the command.
#Download IAM Policy - https://github.com/kubernetes-sigs/aws-ebs-csi-driver/blob/master/docs/example-iam-policy.json


curl -o example-iam-policy.json https://raw.githubusercontent.com/kubernetes-sigs/aws-ebs-csi-driver/v0.9.0/docs/example-iam-policy.json
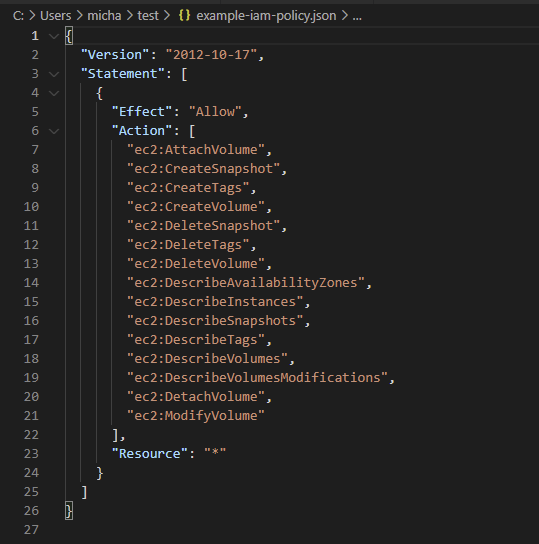
For test purposes, I am also going to keep the same name as the documentation walkthrough. Following the command, I will show how this looks within the AWS Management Console.
#Create policy


aws iam create-policy --policy-name AmazonEKS_EBS_CSI_Driver_Policy --policy-document file://example-iam-policy.json
the below shows the policy from within the AWS Management Console but you can see, well hopefully that the JSON file outputs are the same.
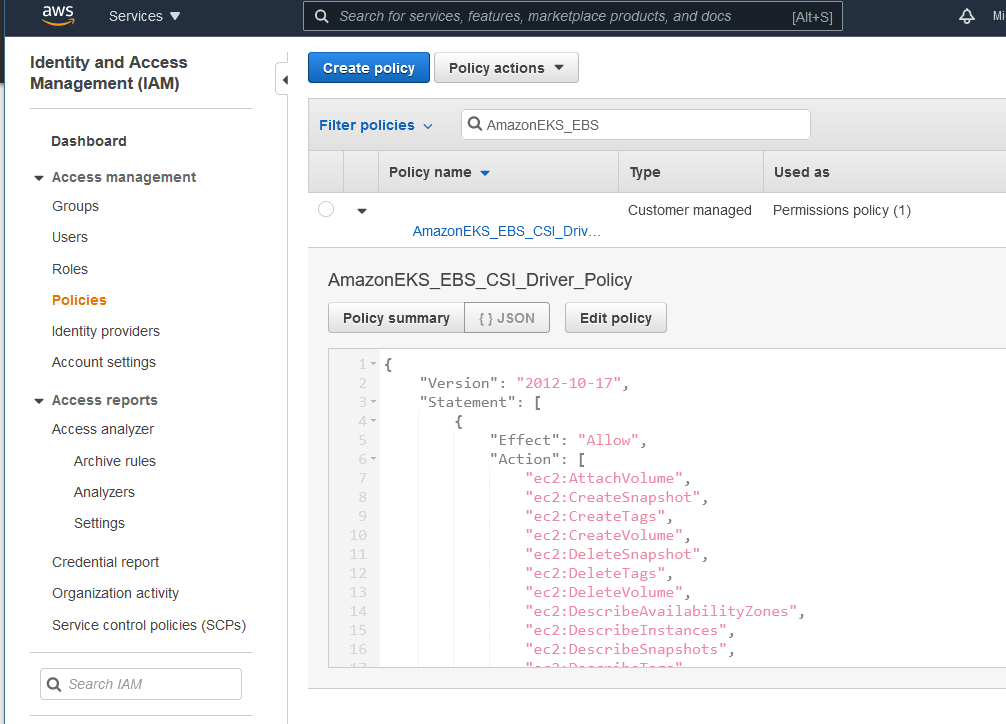
Next, we need to create the IAM role
#Create an IAM Role

aws eks describe-cluster --name bottlerocket --query "cluster.identity.oidc.issuer" --output text

aws iam create-role --role-name AmazonEKS_EBS_CSI_DriverRole --assume-role-policy-document "file://D:\Personal OneDrive\OneDrive\Veeam Live Documentation\Blog\AWS EKS Setup\trust-policy.json"
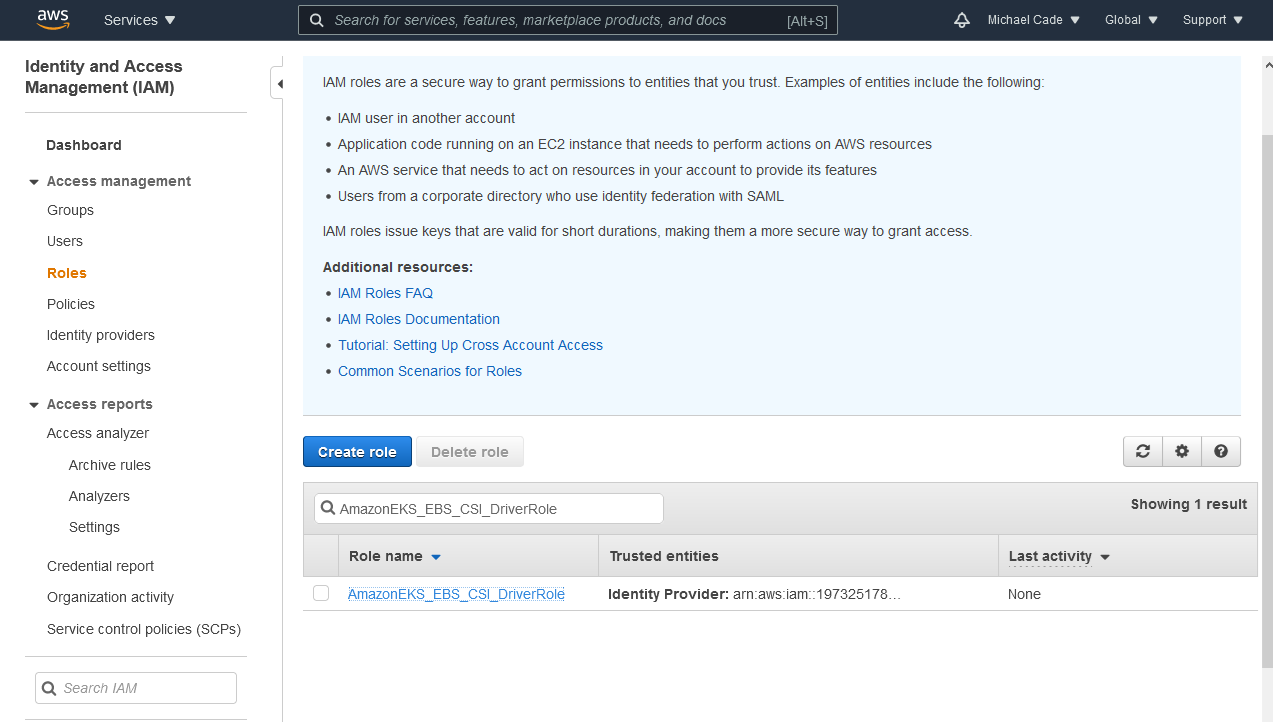
The reason for the first command is to gather the ARN and to add that to the trust-policy.json file You would need to replace the Federated line with your AWS Account ID. Further information can be found on the official AWS documentation. You can find the trust-policy.json below here.
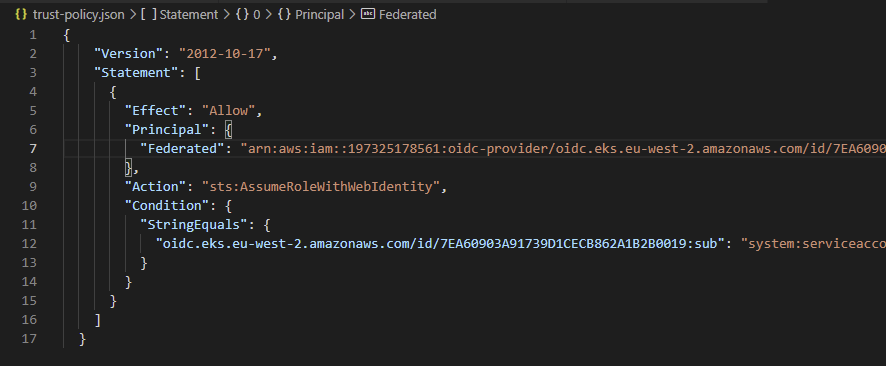
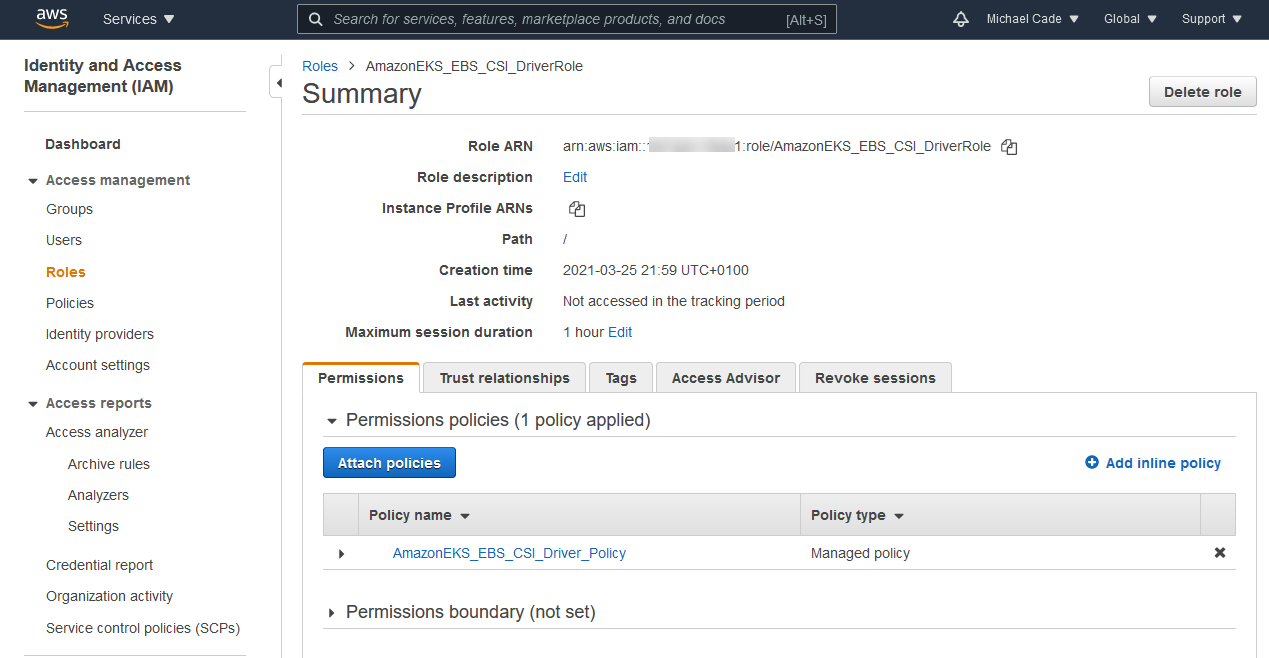
Next, we need to attach the policy to the role, this can be done with the following command. Take a copy of the ARN output from the above command.
#Attach policy to IAM Role


aws iam attach-role-policy --policy-arn arn:aws:iam::197325178561:policy/AmazonEKS_EBS_CSI_Driver_Policy --role-name AmazonEKS_EBS_CSI_DriverRole
Installing the CSI Driver
There seem to be quite a few different ways to install the CSI driver but Helm is going to be the easy option.
#Install EBS CSI Driver - https://github.com/kubernetes-sigs/aws-ebs-csi-driver#deploy-driver


helm repo add aws-ebs-csi-driver https://kubernetes-sigs.github.io/aws-ebs-csi-driver


helm repo update


helm upgrade --install aws-ebs-csi-driver --namespace kube-system --set enableVolumeScheduling=true --set enableVolumeResizing=true --set enableVolumeSnapshot=true aws-ebs-csi-driver/aws-ebs-csi-driver
Now annotate your controller pods so that they understand how to interact with AWS to create EBS storage and attach nodes.
kubectl annotate serviceaccount ebs-csi-controller-sa -n kube-system eks.amazonaws.com/role-arn=arn:aws:iam::197325178561:role/AmazonEKS_EBS_CSI_DriverRole

kubectl delete pods -n kube-system -l=app=ebs-csi-controller
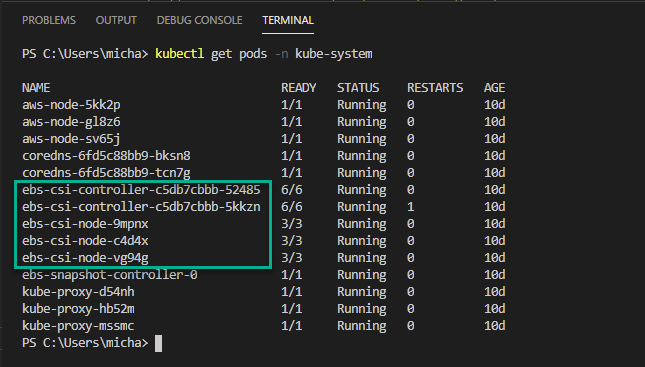
Regardless of how you deployed the driver, you will then want to run the following command to confirm that the driver is running. You will see on the screenshot you will see the CSI controller and CSI node; the node should be equal to the number of worker nodes you have within your cluster.
#Verify driver is running (ebs-csi-controller pods should be running)


kubectl get pods -n kube-system
Now that we have everything running that we should have running we will now create a storage class
#Create a StorageClass


kubectl apply -f https://raw.githubusercontent.com/kubernetes-sigs/aws-ebs-csi-driver/master/examples/kubernetes/snapshot/specs/classes/storageclass.yaml


kubectl apply -f "D:\Personal OneDrive\OneDrive\Veeam Live Documentation\Blog\AWS EKS Setup\storageclass.yaml"
CSI Volume Snapshots
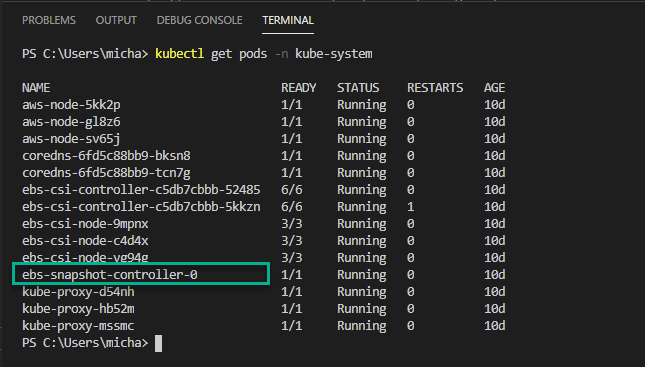
Before we continue to check and configure volume snapshots, confirm that you have the ebs-snapshot-controller-0 running in your kube-system namespace.
You then need to install the following CRDs that can be found at this location if you wish to view them before implementing them.
kubectl apply -f https://raw.githubusercontent.com/kubernetes-csi/external-snapshotter/master/client/config/crd/snapshot.storage.k8s.io_volumesnapshotclasses.yaml

kubectl apply -f https://raw.githubusercontent.com/kubernetes-csi/external-snapshotter/master/client/config/crd/snapshot.storage.k8s.io_volumesnapshotcontents.yaml

kubectl apply -f https://raw.githubusercontent.com/kubernetes-csi/external-snapshotter/master/client/config/crd/snapshot.storage.k8s.io_volumesnapshots.yaml

Finally, we need to create a volume snapshot class this enables operators much like a storage class, to describe the storage when provisioning a snapshot.
#Create volume snapshot class using the link https://github.com/kubernetes-sigs/aws-ebs-csi-driver/tree/master/examples/kubernetes/snapshot


kubectl apply -f https://raw.githubusercontent.com/kubernetes-sigs/aws-ebs-csi-driver/master/examples/kubernetes/snapshot/specs/classes/snapshotclass.yaml


kubectl apply -f "D:\Personal OneDrive\OneDrive\Veeam Live Documentation\Blog\AWS EKS Setup\snapshotclass.yaml"
Those steps should get you up and running with the CSI Driver within your AWS EKS cluster. There are a few steps I need to clarify for myself especially around the snapshot steps. The reason for this for me was so that I could use Kasten K10 to create snapshots of my applications and export those to S3, which is why I am unsure if this is required or not.
If you have any feedback either comment down below or find me on Twitter, I am ok to be wrong as this is a learning curve for a lot of people.

Hi Michael,
I’m wondering how have you deployed ebs-snapshot-controller-0? I cannot find the steps to deploy it as part of the instructions above.
I’m working for Salesforce company in DevOps team.
I’m trying to install AWS EBS CSI driver, snapshot controller and external provisioner in order to be able to restore MongoDB PVC from snapshot (snapshots are taken by AWS backup).
When I deployed the SnapshotVolume and SnapshotVolumeContent (referencing snapshot-ID), the SnapshotVolume READYTOUSE set to false.
Any help?
Best regards,
Ahmad
I’m facing the same issue that is described here: https://github.com/kubernetes-sigs/aws-ebs-csi-driver/issues/1180