Veeam Replication – Walkthrough
Now we have set the scene with our previous posts I wanted to share a complete walkthrough on Veeam Replication and show the simple steps it takes to send your virtual machines from Site A to Site B.
This post is aimed for those environments that have a Veeam Backup & Replication server installed and configured. It will also expect that you have deployed an additional Veeam Proxy on that secondary site.
When I mention secondary site, this could be considered either onsite or offsite. If it is the same onsite location then the same source proxy can be classed and used as the target proxy for data movement, however it must have access to the source and target environments.
It is also required that the backup management server can connect to both source and target hosts.
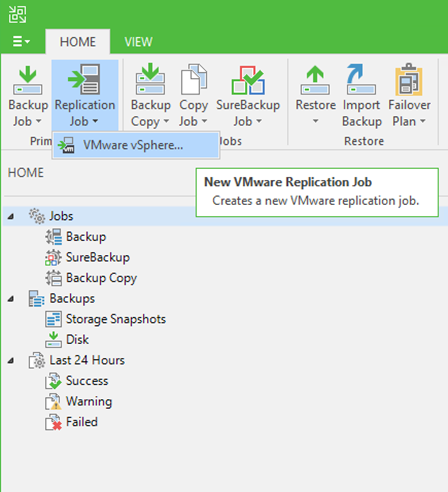
Once you have that deployed its then time to create your replication job. The license file I have is only for VMware but Microsoft Hyper-V is also an option.
Create Replication Job
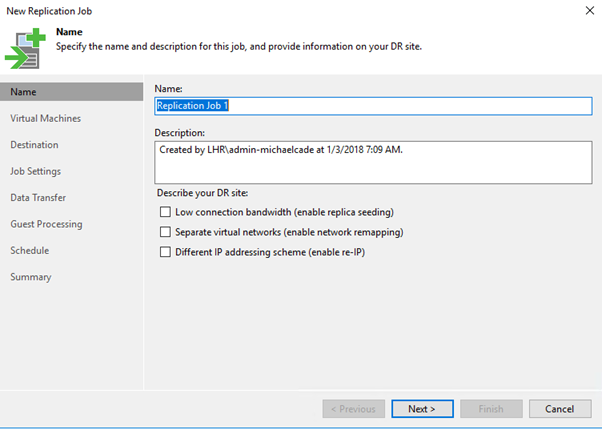
Job Name and Advanced Configuration
A wizard will then open and you can begin to configure how the replication job should look. On the first screen as well as the Job name and description there are some advanced features that we will cover in later posts.
Add Objects
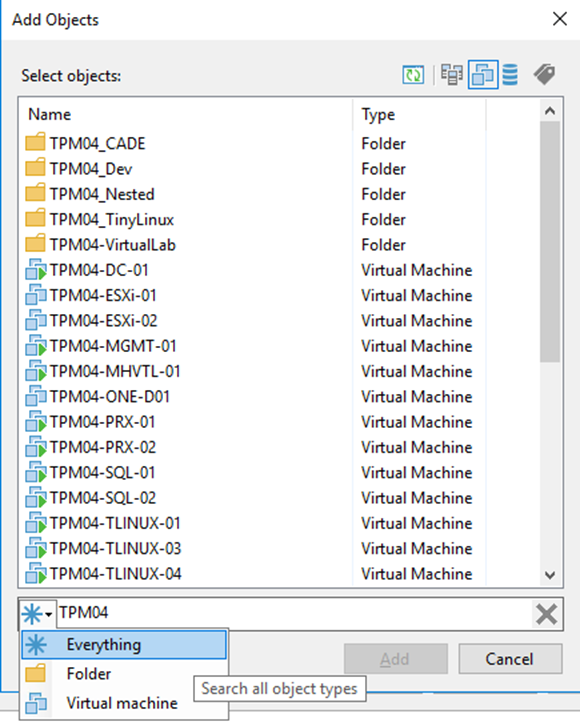
The following screen is probably the most important, this is where you will select the VMs you want to replicate, this can be done by either selecting the individual VM or you can use different construct options in the top right-hand corner, these could be based on cluster or host, datastore or the ability to use vSphere tags or Microsoft SCVMM tags.
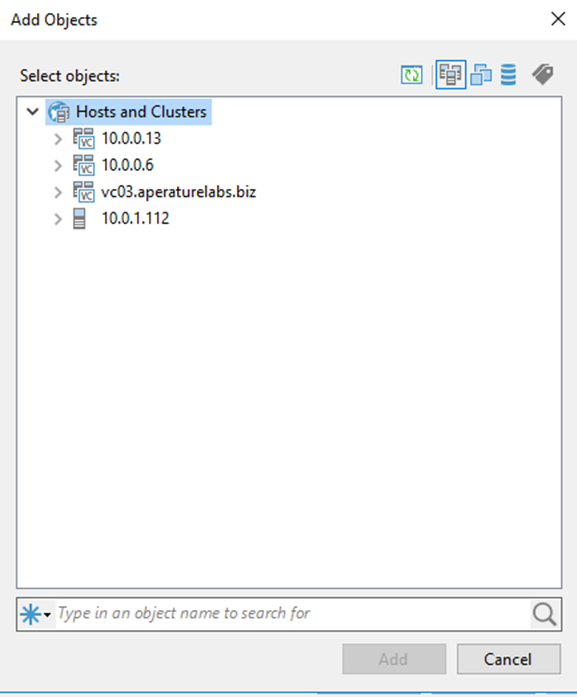
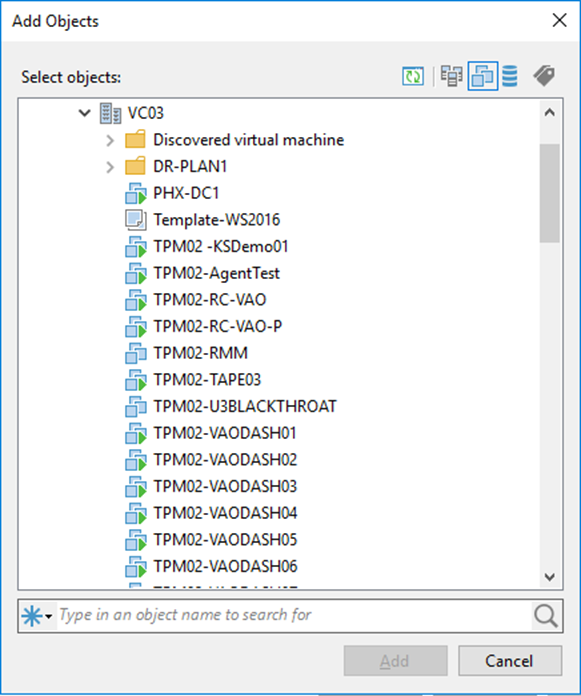
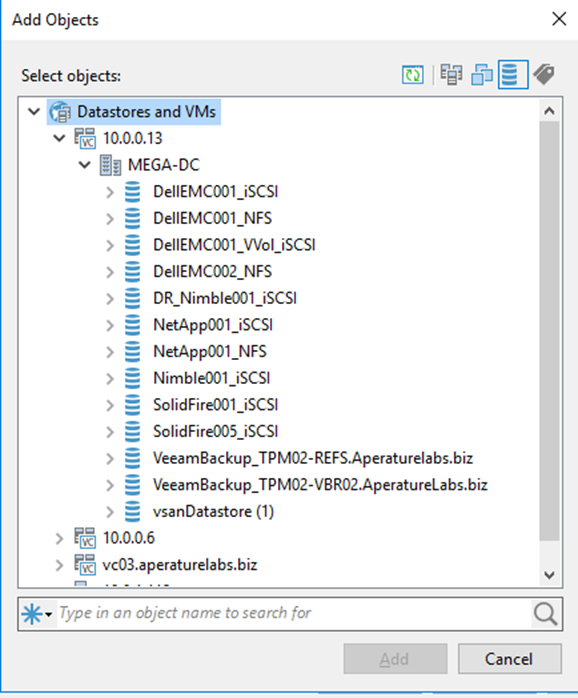
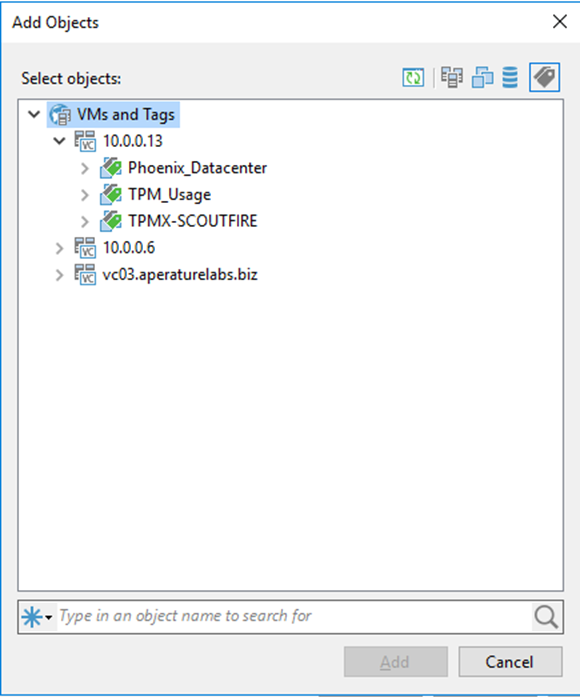
Another useful tip here is if you have a large environment and you want to pin point certain named VMs then you have the ability to search and filter at the bottom of the screen.
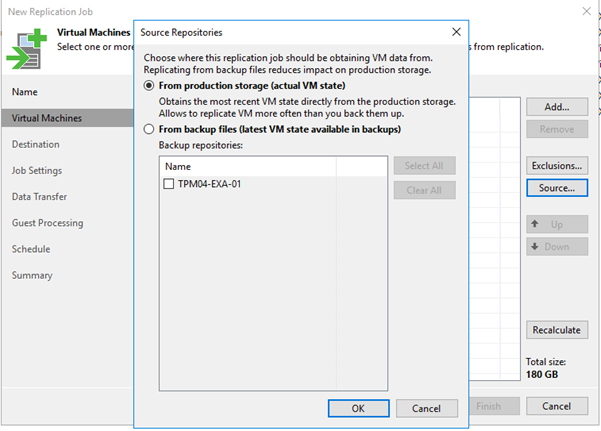
Where are we going to get that data from? We have two options, we can choose to actually take directly from the production storage which is going to take the most recent state of the VM. Or we can choose to take from a backup location. We may cover this second option off in a later post.
On this same screen, we also have the ability to exclude certain objects from the replication job, this could be certain attached disks that are not required in a failure scenario. But for the sake of this walkthrough I am going to keep things very simple. It is worth noting that Veeam will already exclude VM log files and templates to reduce the size of the replicated data.
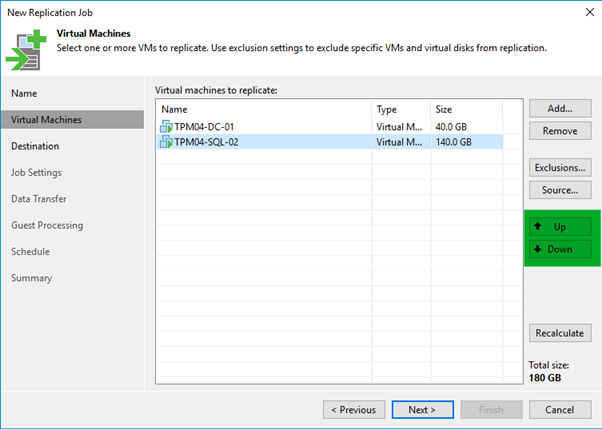
You may have noticed some additional buttons here on this data source screen. The Up and Down function. This allows us to set an order. Mission critical VMs should be at the top because we want to make sure we process them first. (only relevant if you have added individual VMs)
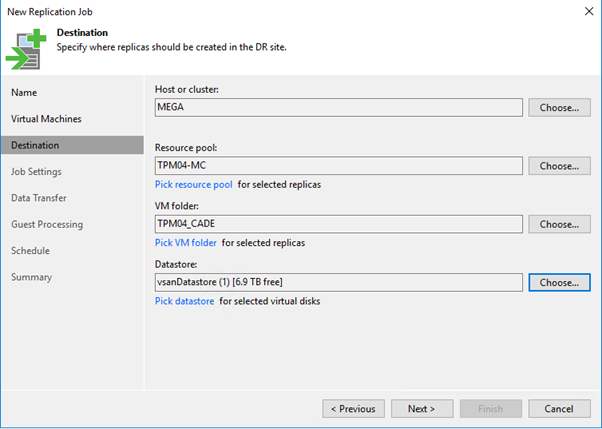
Destination Options
Now we must choose where we want our VMs to be replicated to, we choose our destination cluster or host, we can choose a resource pool or VM folder if we want. Finally, we choose the datastore we would like this replicated VM to be stored in.
Job Settings
This first screen requires a backup repository that has been configured within the management server where the source side metadata can be stored, a replica suffix also should be specified this is how the VM will look within the secondary location i.e VMNAME_replica in this instance, and then restore points. How many restore points would you like or need on that secondary location.
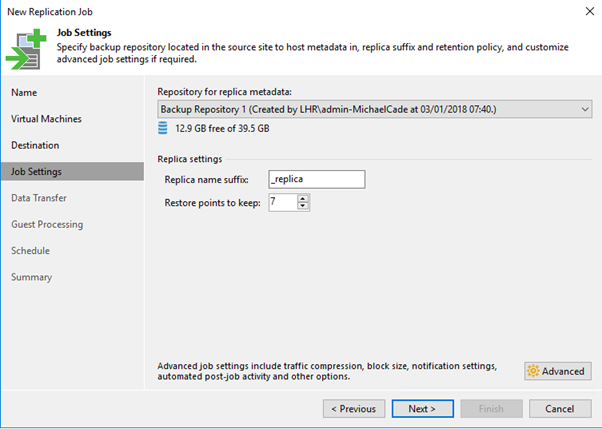
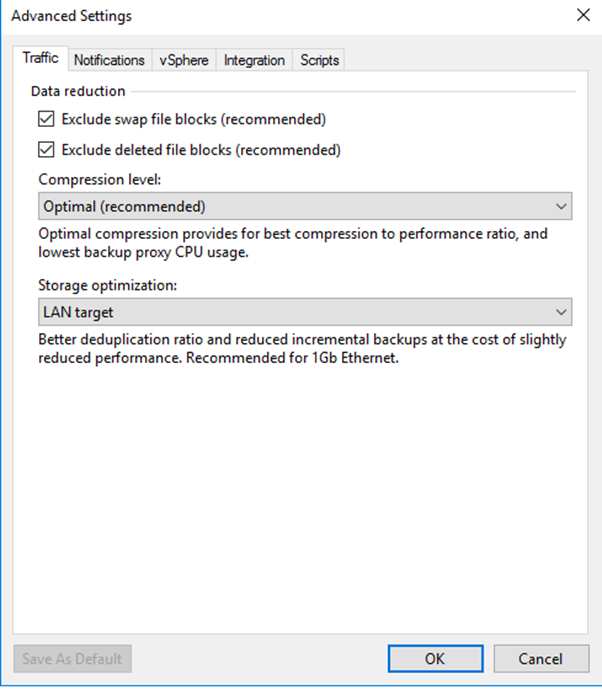
Under the advanced tab we have some additional settings that you may choose to configure depending on your environment and infrastructure.
Traffic settings – By default this is what the compression and deduplication configuration will look like, to understand more about these options then you can find more information here – https://helpcenter.veeam.com/docs/backup/vsphere/replica_advanced_traffic_vm.html?ver=95
Notification settings – This screen allows us to set specific notifications for this specific job either via email or via SNMP or both. https://helpcenter.veeam.com/docs/backup/vsphere/replica_advanced_notify_vm.html?ver=95
vSphere settings – By default it is set that CBT will be enabled but this can be changed if required. You also have the option to enable VMware tools quiescence. https://helpcenter.veeam.com/docs/backup/vsphere/replica_advanced_vsphere_vm.html?ver=95
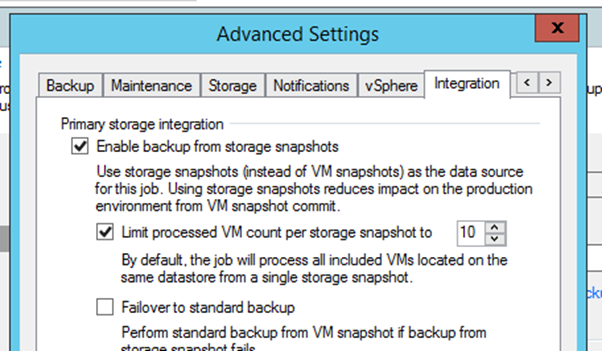
Integration settings – If adding over 100 VMs to a backup or replication job. This could cause a very high VM snapshot lifetime for the first VMs in the job list.
Script settings – This allows you to run pre-or post-scripts before or after the job if you would like to run specific scripts within a VM then you have that option later on in the process under the guest processing wizard.
Data Transfer
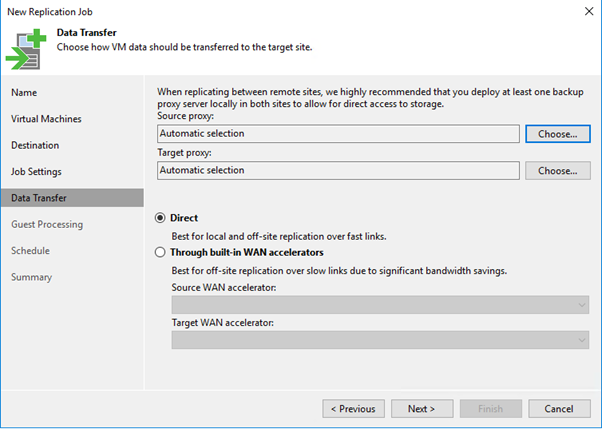
Now to choose how the VM data is going to be transferred to the secondary site. The appropriate proxies at this stage should be selected and you should also determine if WAN Acceleration is used or not this is something we will again cover later on.
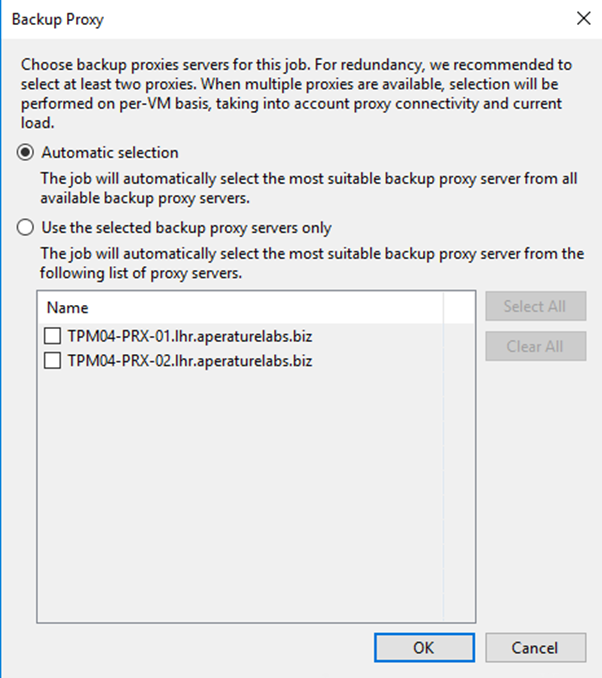
Guest Processing
Depending on the workload it may require your VMs are application consistent. Options can be configued here by providing the appropriate requirements.
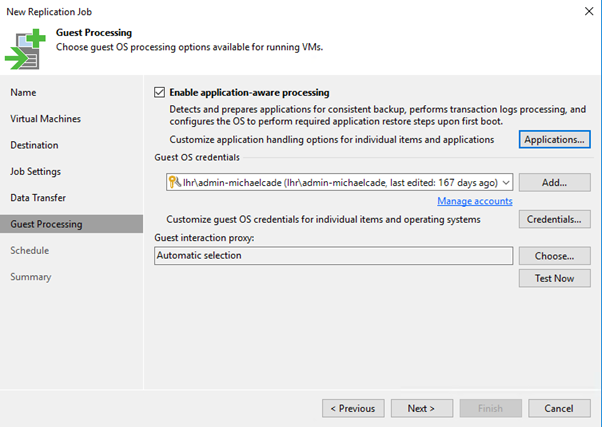
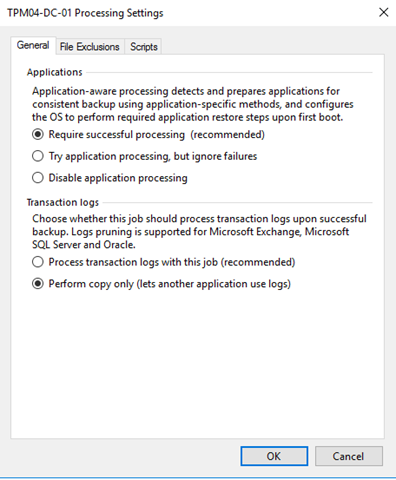
In this instance, I have a backup job dealing with truncation of logs. I have configured the job to copy only the logs to the secondary site. There is also the ability to exclude OS files from the VM and to run specific scripts from within the VM.
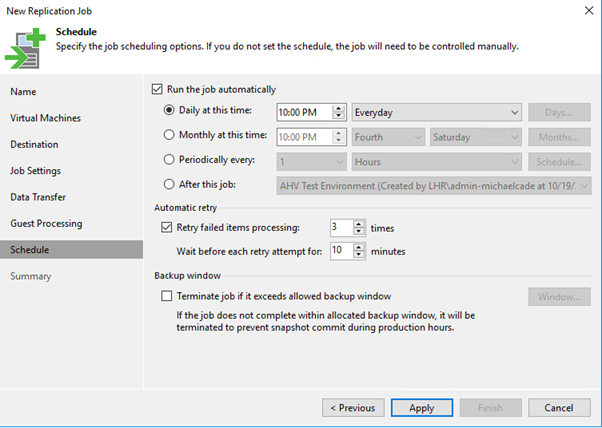
Scheduling
Lastly in the configuration wizard is when we want to schedule this job to run.
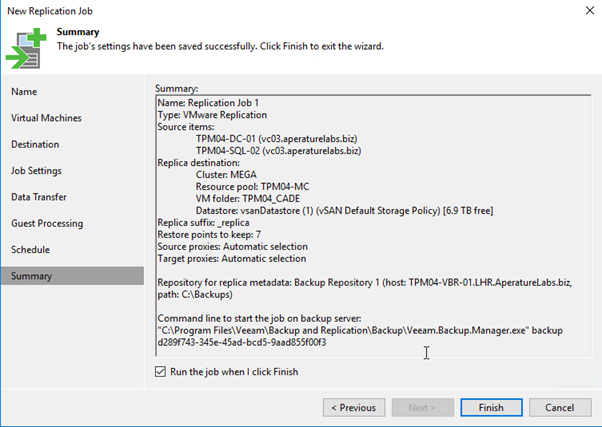
Summary
Summary of the configuration and then we are good to go and run this job against that schedule we just set.
Next up we will look at this same process through PowerShell.
